Thursday, August 30, 2007

Buffalicious


There is a buffalo farm right down the road from my house (Hillside Farm). In fact, when I first moved into my apartment about a year ago there was a big local story about a buffalo heard escaping and blocking the road - turns out it was the same one!

Anyway, this makes it quite convenient for me as I am a huge buffalo lover! Besides thinking they are super cute, I think that buffalo meat is extremely tasty. If you have never had it, you are missing out. Obviously, it tastes "beef-like" but I think its way better. In addition, buffalo meat is a lot healthier - Not only does it have 70% to 90% less fat compared to beef, on average it has 50% less cholesterol. And on top of that, it is higher in protein, iron and all the omega and amino acids. Buffalo are not subjected to chemicals, drugs and hormones. Nor are they force-fed in high density pens. They are handled as little as possible and spend most of their time grazing. If you have read anything about commercial feed lots and the negative health effects, you know this is a good thing.

Randi and I went to the store and met the owner of the farm, he let us walk back to the fields where we saw a 2-day old buffalo baby plus many other of its relatives. There is something very satisfying about seeing that your dinner leads a happy, relaxed life, with lots of grass to graze on.

I bought a pound of ground meat for $5 and decided to use it make the chili recipe that the farm has on their website. I substituted a little because of the ingredients I had on hand (lots of yummy veggies from my parent's neighbor's garden in NY).

RUSTIC BUFFALO CHILI
Serves 8

Ingredients

1 pound ground buffalo
3 cloves garlic, minced
1 cup chopped bell pepper
2-3 tablespoons chili powder
2 teaspoons salt
1 teaspoon dried leaf oregano, crushed
1 teaspoon ground cinnamon
1 teaspoon ground cumin
1/2 teaspoon ground black pepper
1/4 teaspoon ground paprika
2 large tomatoes, diced
2 cans (8 oz. ea.) tomato sauce
1 can (15 oz.) small pinto beans, rinsed and drained
1 can (15 oz.) black eyed peas, rinsed & drained
1 jalapeno, chopped finely
1 summer squash, diced
Olive Oil

Directions:

Coat surface of large pan with olive oil. Saute buffalo for 3 minutes, stirring to crumble. Add garlic, saute 5 minutes. Mix in jalapeno, squash, bell pepper, chili powder, salt, oregano, cinnamon, cumin, black pepper, paprika and cook 2 minutes. Add tomatoes, tomato sauce and beans. Stir to blend and simmer for 45-60 minutes. Serve with condiments - shredded cheese, chopped green onion, sliced black olives, sour cream, tortilla chips.

I was really happy with the way this turned out. To be honest, I was slightly nervous before I started cooking (I don't really know why - no chili experience I guess), but it was really easy and seemed foolproof. This is a dish that you definitely want to keep tasting as you go along to determine salt level. I added a bunch more than the recipe called for. The flavors meld with cooking though....mmmmm.....we had it with some sharp cheddar and zucchini bread Randi made. A perfect meal.

Tuesday, August 28, 2007

Garbanzo Bean Bruschetta + Pizza

At the moment I'm still apartment-less. Rob's been a great help with all the moving and shuffling around that's happened in the last few weeks (not to mention moral support) and let me stay with him the past few nights. Last night my book group meeting was cancelled so I decided to cook Rob a "thank you" dinner.

I knew I wanted to make some garbanzo bean bruschetta--a fantastic and easy recipe that my cousin Danny used to make for me when we both lived in Providence. I'm still trying to avoid gluten so I picked up some quinoa pasta for a side and planned to use grilled zucchini and eggplant in place of crostini for the bruschetta.

I got a little sidetracked however when I realized that my local coop just started stocking the new vegan pizza offering from Amy's Organics. Supervegan and a number of other vegan blogs had been singing the praises of this pre-prepped frozen dish and I had eagerly been searching my local markets for it. Needless to say, with the holy grail of frozen dinners standing right in front of my face, dinner plans were altered slightly.


I bought the pizza, returned the eggplant and zucchini, but kept my bruschetta ingredients. Usually I use about six roma tomatoes for this particular recipe but the coop had a special on "slicing tomatoes" from local farms so I bought two of those large babies instead. They worked about as well but I'd still recommend using the romas instead--the texture is better and they're easier to dice into small pieces (since we were topping pizza slices and not bread I roughly chopped the tomatoes).

(lovely camera phone shots)

Halfway through making the bruschetta I realized that I forgot one of the most key ingredients: garlic cloves. I used some garlic/parsley powder that I found in Rob's pantry--it worked ok taste-wise but wasn't the same as the real thing. I usually dress the bruschetta with balsamic vinegar and olive oil but opted instead to use some of this great Newman's own olive oil vinegarette that I'd recently purchased. Tasted good but for future occasions I'll stick with the balsamic.


The pizza was tasty but interesting. For anyone who's ever cooked with (or even just eaten something made from) rice flour, you know that it's very crumbly--it doesn't hold together the way that wheat flour does--it's much cakier. The soy cheese mix on the pizza was fantastic and the spinach, despite being frozen, tasted fresh. The crust was an issue as it was very soft and crumbly. For future dinners I'll leave the pizza under the broiler a bit longer than the box instructs.

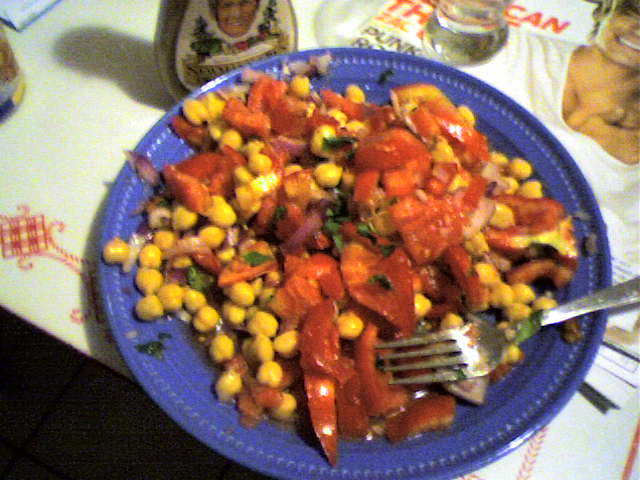
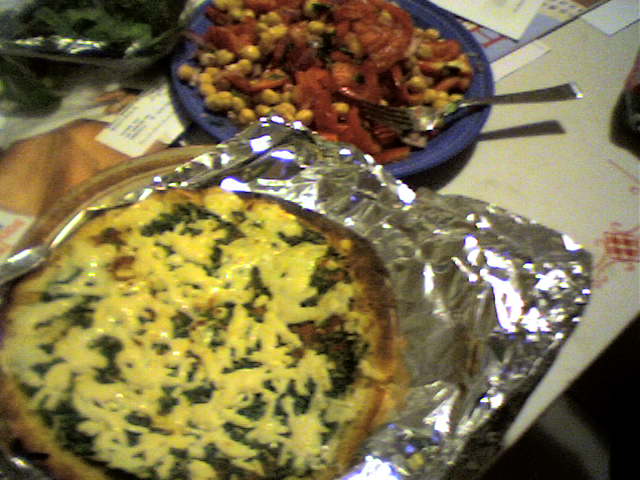
(Final products--the cameraphone messes with the color--nothing was as "gold/yellow" as it looks).

On to the recipe:

Garbanzo Bean Bruschetta

Crostini (thinly slice a baguette, coat slices in olive oil, toast in oven for 20 minutes)

6 roma tomatoes, diced
6-8 leaves fresh basil, chopped thinly
small red onion or 1/2 a large onion diced
1 can garbanzo beans drained and rinsed
2 cloves garlic, chopped (really up to you)
balsamic vinegar, olive oil, S&P to taste (a couple of tablespoons of each liquid should be fine).
Toss in a bowl, coat everything well with dressing, and top the crostinis--you're done.

Thursday, August 23, 2007

French Toast!

Whenever I'm home my mom takes every possible opportunity to cook for me (while I like to turn the tables). A few months back mom "borrowed" (read stole, but it's cool b/c I had two copies) my Vegan With A Vengeance cookbook--it's not unusual when I come home to see Momma curled up in a corner paging through this glorious book.

I got the "ok" to start adding wheat back into my diet right at the same time that Mom just happened to have a loaf of bread that needed to be used. Solution: French Toast.

We followed Isa Chandra's VwV recipe pretty closely but used sliced bread instead of french (we toasted it first but found that it also works well to let the bread stay as is). Isa also recommends a half cup of nondairy milk plus one half cup of Silk creamer. As I still have to avoid soy we opted for one full cup of rice milk.

Verdict? Delicious! My dad didn't even notice he was eating "nontraditional" french toast. Plus the chickpea/fava flour adds a good healthy dose of protein to the mix.

I don't have a digital camera at home, but this other picture of "fronch toast" looks pretty much like ours:


I (and Momma, and Dad) highly recommend this breakfast recipe--it's super quick, easy, and, ::wink wink:: cholesterol free so it's a great alternative to regular french toast (coated with butter and eggs).

Recipe follows--happy eating!

6-8 slices white or wheat bread toasted
1 cup rice milk
sprinkle of cinnamon
1/4 cup fava and garbanzo flour (this is what we bought but chickpea flour is the same)
2 tablespoons corn starch

Mix the flour and corn starch together (we used a whisk). Pour in the rice milk and keep stirring (it's ok to be a little lumpy).

Heat up a medium sized pan with a few tablespoons of canola oil (Mom really wanted to use soy margarine but I vetoed the idea).

Dip and coat your bread slices in the flour mixture then toss in the pan. Sprinkle with cinnamon. You'll probably want to give each side about two minutes before flipping, and voila! You're done.

Wednesday, August 22, 2007

Mmm Mmm Good.


For those who don't know, I've recently moved in with Georgia, bringing in not only cold weather and rain (ick) but also culinary inspiration! While discussing lunch today, shivering in our sweaters and sweatshirts, the conversation quickly turned to soup and I thought of a potato leek soup recipe I had meaning to try out in William Alexander's The $64 Tomato. This funny book details the author's vast (and expensive) gardening experiences, and has some tasty looking recipes to boot. (As you can see, I'm not the expert picture-taken that Georgia is, but you get the point :P)

Leek Potato Soup
(borrowed from The $64 Tomato)

1 1/2 pounds leeks
2 tbs butter
3 medium potatos (author recommends Yukon Gold, I used red bliss)
4 cups chicken broth
1/2 cup heavy cream
salt and pepper to taste

1. Cut off roots and green tops of leeks, leaving about an inch (or two) of green. Discard outer layer of leeks and cut leeks down the center length-wise. Rise thoroughly. Cut into 1/2 inch pieces.

2. Melt butter into a soup pot and saute leeks on medium heat for about 10 minutes - until leeks soften and turn translucent.


3. Peel and cut potatos into chunks. Add potatos and chicken broth to pot. Turn up the heat to a boil and then back down to a simmer. Leave the cover slightly ajar and let cook for about 30 minutes, till potatoes get soft.

4. Remove from heat and use hand blender (or transfer to standing blender) to blend in potatoes and leeks. When done, return to low heat.

5. Wisk in heavy cream, add salt and pepper as desired.

6. EAT!


This was easy and super tasty - which means I'm likely to make it again and again. Perfect for a cold rainy day (even in August) :)

FYI - I made sure to use free-range chicken broth, as should you. There's no reason chicken should have to live in cages just so you can make good soup. For those who don't want any chicken broth, I recommend a veggie broth instead of just water.

Monday, August 20, 2007

To Can or Not to Can

This past week my mom visited me from Connecticut. And as you loyal blog readers probably know, I have inherited my love of cooking/food from her. I decided that as one of our mother/daughter activities, we would can the peaches that I had picked up at the farm stand (see previous post). Canning is an excellent activity! It is also decreasing in its popularity, which really is a shame. NPR just had a really interesting editorial on canning that you should check out called Preserving Our Past, One Jar at a Time. As I have read more on the benefits (both nutritionally and economically) of eating locally grown foods, it seems that I also have had to address whether I want to rely on fruits and veggies shipped from warmer climates in the winter. So, to combat this, I have decided to try to can some local produce to eat in the winter (I will readily admit that I will probably still get stuff from the local grocery store in the winter, but hey, its a small step!)

The peaches turned out great, we used a really simple recipe that was on the back of the pectin box (Pectin is a jelling agent used in jams and jellies). We blanched the peaches to make the skin come off easily and then peeled and cut them up into small chunks. The three types of jam that we made were Peach, Ginger-Peach and Blackberry Peach. I didn't use sugar, but rather organic peach and apple juice for the sugar substitute. I'm not going to go into too much detail about the canning process. There is a recipe in the pectin box for all types of fruit jams and jellies. Also, this website is very informative.

Peach Jam
makes approximately 5 pints

Ingredients
8 cups fruit, chopped
1/4 cup lemon juice
2 packages pectin
2 cups juice (we used a combo of peach/apple)

Directions
1) Chop fruit and mix in lemon juice to preserve color.
2) Set fruit on stove in large sauce pan. Mix in juice and slowly mix in pectin.
3) Bring to a boil. When the jam is thick (you can spoon a small amount onto a plate and if it gets "jammy" it is ready) pour into your sterilized jars.


We also went to the Amish Country and bought a peck of cucumbers and 1/2 a peck of beans for a total of $6!

Dill Beans and Cucumbers
This recipe is for one pint, so adjust for your needs

Ingredients

1 clove garlic, chopped
Salt
Alum
Dill weed
Canning jar
Sm. pickling cucumbers
Vinegar
Black whole peppercorns (we used a pickling spice mix)

Directions

Wash cucumbers and remove stems. Fill jar with cucumbers. Add 2 sprigs of dill weed and 2 tablespoons black peppercorns. Add a sprinkle of alum. Add chopped garlic. Add 1/4 cup vinegar. Mix 1 1/2 teaspoons salt to 1 cup water and fill jar to 1/2 inch from the top. Seal and place jar in a dark place for 2-3 weeks or more.

Make sure you don't have a drafty space, this could crack your jars. Don't get overwhelmed, the rewards are worth the effort!

Monday, August 13, 2007

Who Says We Can't Eat French Food?


Another late night post. So, again, forgive me if I come off a tad bit incoherent....This meal was devoured on Sunday morning, but I've been too busy to really write until now. I suppose technically I should be writing other "work" related things, but this is more FUN!

On the way up to Musikfest (a local week of drunken music related debauchery - see pic of the girls below) we stopped at a peach stand on the side the road. Unfortunately I don't remember what it was called...maybe someone reading this can put a comment on it. Anyway, they have this wonderful thing they do were they sell a bushel (and I mean giant bushel) of peaches called "ground peaches" for $6. This means that these peaches were picked off the ground instead of being picked out of trees. Whatever, for six bucks, these are the most delicious ripe peaches you have ever had! Besides tasting great, peaches are low in calories and one 100 g peach provides almost three quarters of the daily vitamin C requirement. Peaches are also rich in iron and potassium.

So, with a plethora of peaches in hand, we went about brainstorming our Sunday morning breakfast. Automatically, peach waffles, peach muffins and peach pancakes jumped into the conversation. However, when John suggested that we make crepes with peaches, the brainstorming ceased. Selah was in town from Oman and happens to be an expert crepe maker. So, while she made the crepes I set about making the peach filling and some cheesy scrambled eggs.

I'm not sure of the exact recipe she used, but I'm sure this one from epicurious.com will fit the bill.

To make the peach filling, I combined 1/2 cup of water, 3 cups chopped peaches and 1/4 cup maple syrup. Basically, I just brought it to a boil and cooked it down.

Scrambled eggs + sharp cheddar = WOW!

Friday, August 10, 2007

When You Just Can't Eat Anything

Hello, hello, lovely bloggers/readers. I'm sure you've all been wondering: where the hell did that silly vegan go?
My apologies for being so remiss with posts over the past few months. I've been dealing with an unusable kitchen, a bevy of food allergies (apparently you hit 25 and these things just appear), and impending homelessness. Next week I've got an appointment with an allergist to help me figure out how to eat food and keep breathing, and as of September 1, I'll be in a new, spiffy apartment (hopefully spiffy) with a usable kitchen.

With that, on to some recipes/shout outs, other fun things.

Normally I'm against pre-prepped foods or mixes in all of their nasty forms. However, when you can't eat wheat, peanuts, dairy, and a slew of other things, sometimes you need a little back up (and a little comfort). The following products have been helpful, convenient, and tasty sources of quick comfort food:

Road's End Organic Mac N Chreese (Gluten Free)


So it's not Kraft (ewwww), but Road's End is a great option for vegans, those watching their weight, and anyone with gluten issues. The gluten free alfredo is a personal favorite of mine (it's also soy free). Took it to a recent bbq and with some fresh tomatoes mixed in, was not an entirely disappointing substitute for regular macaroni salad.


Cherrybrook Kitchen (Gluten Free)

I love love love the good folks at Cherrybrook Kitchen. It's hard enough being an adult with food allergies--I can't imagine being a little kid who couldn't indulge in birthday cake with their friends. All of Cherrybrook's regular products are certified vegan and peanut free (and trust me, dessert lovers everywhere, vegan or not will love them), and now Cherrybrook offers Gluten-free mixes as well. Made a chocolate cake with the mix for the same bbq and it went over quite well. Also used a touch more water plus a few good tablespoons of chai spice mix to create a good treat for breakfast.

Rice Noodles (of any kind)

These handy babies will run you about a dollar a pound at any Asian or ethnic grocery store. I love the flat wide rice noodles for stir fry. Toss your veggies in a wok with some oil, prep the noodles, add a bit of Sriracha and you're good to go.

And fear not my friends, should you too, be suddenly struck by dumb luck and food allergies (this is what I get for being a heathen), there are tons of great resources out there to help you "adapt" to your crap-tastic new life style. A few books I've liked so far:


The Mediterranean Vegan Kitchen is an awesome awesome book. There's not a vegan or allergy related web forum I've come across yet that doesn't praise this fine piece of work. Just about every recipe is either soy or wheat free too. As for the first selection up there, books for kids are great--the recipes are usually easier and much more "everyday" than books geared towards adults. Gourmet food is all well and good, but sometimes I just want pancakes dude.

Finally, I know I promised a recipe for cupcakes sometime soon...well, no worries, it's on its way. I'm due to compete in a bake off this fall and am going to be submitting an entry in the "allergies" category (ha). The winning recipe will get some face time here on this lovely blog.

In the meantime,

love, peace, veggie grease,
Alli

Wednesday, August 8, 2007

To Feed An Army

This past weekend, Carolyn and I journeyed to the depths of West Virginia to be the "Team Chefs" for Team Sorensen - Luke and John's Saab rally car team.

This madness started a few months ago when we went to check out this rally thing at the STPR Rally in Wellsboro, PA. Here, we ended up feeding the guys with food we had picked up along the way (PB&J, carrots and hummus, etc - nothing special). However, it worked out well enough that we "volunteered" to tag along at the other rallies and keep the crew well nourished (they are also a lot of fun). Carolyn and I had never been responsible for this magnitude of food before (3 meals a day for 10 people for 2 days), so took our duties very seriously. The first place we went to was Costco to stock up on some bulk food...we then filled out the rest with stuff we had at our homes. In addition, we decided that we would make many many cupcakes to sell at the rally along with the t-shirts Luke had provided.

The cupcake selling went really well, we made $38 on CUPCAKES!!! It was very exciting. It turned out that our biggest market was the volunteers who were stuck all day at the spectator points. They literally rushed me when I brought out the baked goods.

In addition to baking cupcakes (with homemade frosting) we made muffins and banana bread for breakfast. They both turned out exceptionally well, with the muffins being a huge hit. As it is quite late, I will not go into too much detail on these, besides provide the recipes and pics - you should definitely give these muffins a try though, they were great!

Triple "Berry" Muffins - Made by Randi!
Yields 12

Ingredients

3/4 stick (6 tablespoons) unsalted butter
1/3 cup whole milk
1 whole large egg
1 large yolk
3/4 teaspoon vanilla
1 1/2 cups all-purpose flour
3/4 cup sugar
1 1/2 teaspoons baking powder
3/4 teaspoon salt
1 cup fresh blueberries (from Carolyn's house)
1 cup raspberries (we used wineberries from my grandparent's backyard)
1/2 cup cherries, halved and pitted

Directions

Put oven rack in upper third of oven and preheat to 375°F. Generously butter muffin pans.

Melt butter in a small saucepan over moderately low heat, then remove from heat. Whisk in milk, then whisk in whole egg, yolk, and vanilla until combined well.

Whisk together flour, sugar, baking powder, and salt in a bowl, then add milk mixture and stir until just combined. Fold in fruit gently but thoroughly.

Divide batter among 12 muffin cups, spreading evenly.

Banana Bread
1 loaf
Ingredients

1/2 cup solid vegetable shortening
1 cup sugar
2 eggs
3/4 cup mashed ripe bananas
1 teaspoon baking soda
1/2 teaspoon salt
1 1/4 cups flour
1/2 cup macadamia nuts
Pinch of cinnamon
1 teaspoon vanilla

Directions

Preheat the oven to 350 degrees.

Oil and flour a 9x5x3-inch loaf pan.

Using an electric mixer, cream the shortening and sugar. With the mixer running on medium speed, add the eggs one at a time. Add the bananas and mix well. Add the baking soda, salt, flour, nuts and cinnamon and mix thoroughly. The dough will be sticky.

Pour the dough into the prepared pan and bake about one hour or until the center is brown and set.

Overall, we had an excellent weekend, the guys were a lot of fun and the team got 5th place in the 2WD Max Attack competition - and won $1,000!!! Yay!!!

Wednesday, August 1, 2007

Yum Yum - Steak Salad

Tonight I made something that I have been thinking about for a few weeks, but putting off (for some unknown reason) - Steak Salad. With the temperature remaining over 85 degrees well into the night, it is good to have these meals that take minimum cooking.

In addition, despite the dreaded "red meat" this dinner was pretty healthy. It was chock full of vegetably goodness! Plus - as an added bonus, a good portion of this salad came from local sources.

- Tomatoes from Carolyn's garden
- Corn from Carolyn's Dad's garden
- Red leaf lettuce from a farm in Lancaster, PA

Sweet!

Anywho - this made for an excellent and quick post-climbing meal (after all it is a Tuesday) and was enjoyed by all. Served with corn on the cob and umm Miller Lite (we are trying to finish all the nasty beer to re-stock on the good stuff) it was perfect.

Steak Salad
serves 4

Ingredients:

1 pound skirt steak
1 bell pepper
1 large tomato
1 cup mushrooms, sliced
4 oz stinky cheese, crumbled (aka blue or Gorgonzola)
balsamic salad dressing
1 cup red wine
lettuce
salt and pepper

Directions:

1) Salt and pepper steak. Marinate for 1 to 2 hours in red wine.
2) Grill steak and slice across the grain.
3) Assemble the remaining ingredients and top with sliced steak. Toss with dressing to taste.


Related Posts Plugin for WordPress, Blogger...